Friday, January 7, 2011

Time and Energy

My jewellery has been very much neglected of late. I rarely have the time to work on jewellery, and if I do have some time, I NEVER have the energy.

Today is one of those rare days where all the elements aligned...

I had some inspiration, I have been working on the designs for these two pieces for a while so I knew exactly what I wanted to achieve and how I planned on doing it. Having a plan is great as no time is wasted, and by tag teaming two pieces I can spend every moment being productive.


More uncommonly, I had time! Fridays are normally a flurry of activity with play dates and errands, however today was a free day. Miss 10 months had a nice long sleep in mum and dad's bed (I don't know why but this little lady has the best sleeps in a queen sized bed). And my hubby had the day off too so he was about to keep Mr 3 busy.


And most rare of all, I had some energy! Just some mind you, once the afternoon heat really kicked in I had to call it a day, which is why these are works in progress rather than completed pieces. But I think seeing them come together will give me the energy to continue on.


I have a whole stash of stones ready and waiting, I hope this momentum continues ;)

Friday, October 15, 2010

Salvage Operation

Things don't always go to plan, sometimes they melt or collapse or just aren't quite right.

Last year I was working on a ring with a princess cut amethyst, everything was going perfectly... until... late in the afternoon in a rush to get finished I was too impatient and cracked the stone while trying get it to drop into the setting.

Yes we have these setbacks, and while it is very disappointing, all is not lost. If you can still salvage the piece it is a wonderful thing. In this case the ring and setting were fine, so it was just a matter of waiting until I bought new stones and trying to source another stone to fit.

Fast forward to a year later and I had cause to place an order for gemstones. Luckily I remembered to check the princess cut stones of aproximately 5mm square.

So finally... the Knife Edge Ring gets to see the light of day, with a lovely princess cut peridot.

Friday, September 17, 2010

Techniques and Technicians - Wire Wrapping

Wire wrapping is a technique that involves the use of tools such as pliers, mandrels, vices and hammers to bend, twist, bind and forge. The intricate patterns and shapes are achieved without the use of solder.

I am drawn to the rather romantic and ornate designs that people achieve with this technique. As with other jewellery techniques, people who practise wire wrapping develop their own distinctive styles achieving varied and unique results.

Three of my fellow jewellery artists on Etsy have kindly shared with me some info about their creative process using wire wrapping.
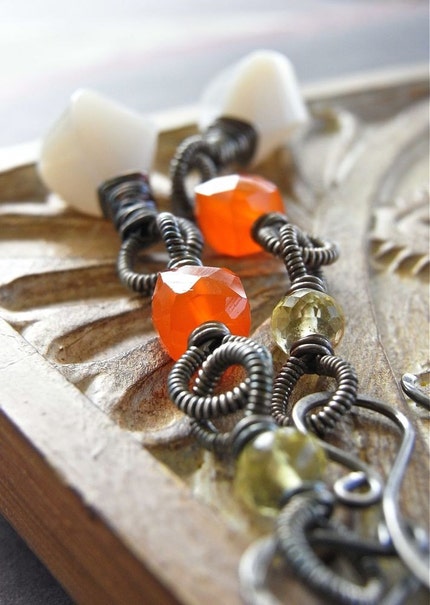

Angelene


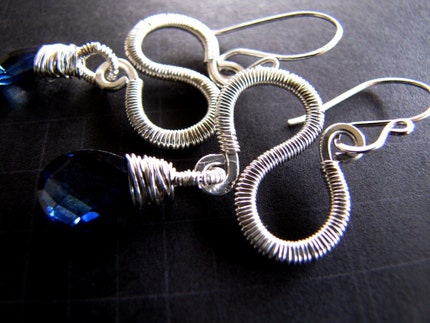
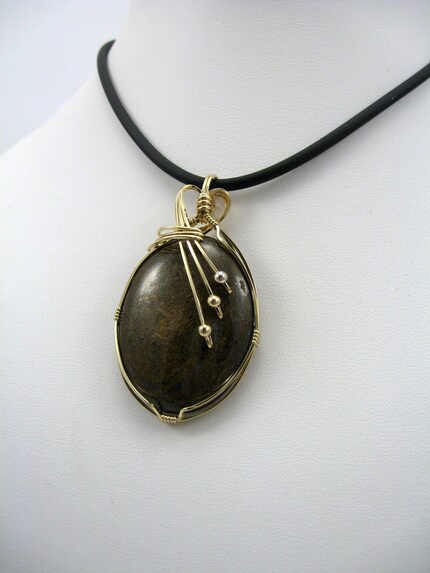
I love wire wrapping. It's mesmerising. The feeling when a large piece has been completed is one of achievement (and sore fingers!). My wrapping style definitely reflects my personality - measured, careful and meticulous.


I first started wrapping unhammered wire for a pair of long drop earrings - because I hadn't hammered the wire first it was not hard enough and so after wrapping the whole length it bent, and ruined the pair of earrings. An expensive mistake that I haven't repeated! Gradually my wrapping has become more precise, and I can wrap in small spaces (such as the top of a loop of a wrapped briolette gem) which gives a neat but detailed finish to my work.


RiverGum Jewellery

I discovered beading one afternoon when my niece arrived from Perth with a few beads, headpins and ear wires. I then did a short two-hour course at the local bead shop learning how to shape eye pins and link beads together to form a necklace and earrings.

I was hooked right from the beginning. That was 7 years ago!


I actually don’t remember where I saw wire wrapping for the first time but I learnt my basic techniques from various tutorials on the net and in books and magazines. I soon left them behind as I developed my own style.


It took a long time to understand the wire itself – the descriptive words of gauge, hardness, square and half round etc, were like a foreign language to begin with.

And now it seems intuitive. First I choose a gemstone to work with and an idea begins to evolve. Instinctively I decide which wire to use – half hard or dead soft. I love the feel of the wire in my hands. It’s almost as if it forms itself rather than me deciding the look I want. I love the adrenalin rush as the piece begins to take shape and I wonder if it will come together in the end. Some of my best work has been when I needed to resurrect what I thought was a disaster!


And of course there is the joy at the end when a customer is drawn to a piece, reads about the particular gemstone and exclaims “that’s just what I need in my life right now!”
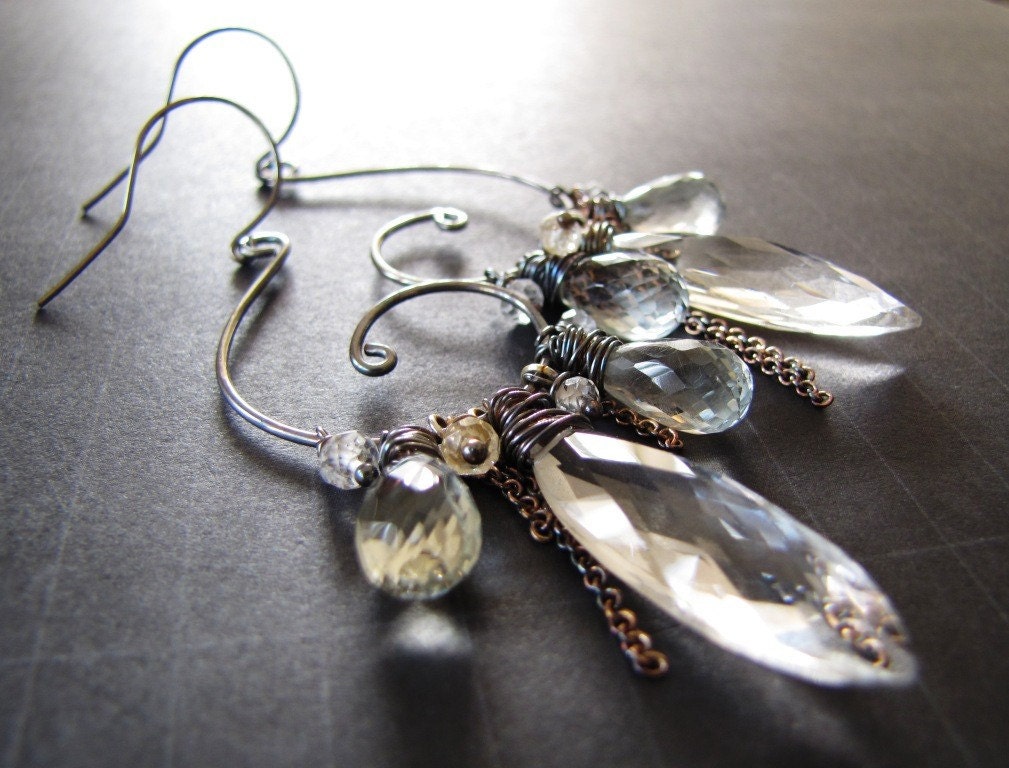
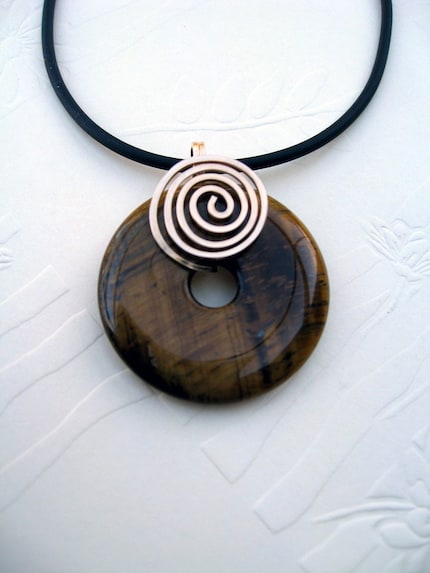

Realisation Creations

I loved using wire the minute I started experimenting with it. My first wire wrapped pieces were extremely simple, but as I started to push myself creatively, I started realising that instead of beads being the components, and the wire just being the connective material, that wire wrapped with beads could form an independent component.


I love the texture created when using wire - whether wrapping over another gauge of wire, or creating teensy charms - it's fascinating to me that such an industrial plain looking material can be converted to something so tactile!


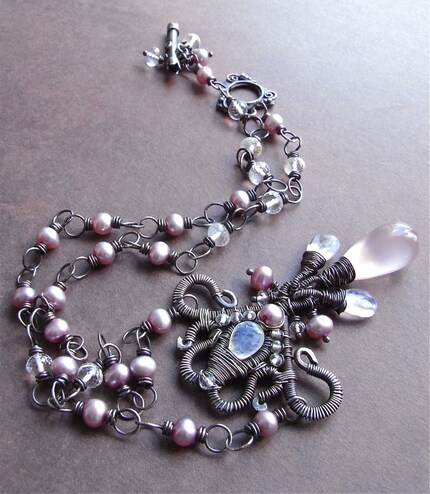
I suppose my style of jewellery is quite Victoriana, and a little bit gothic. My love of Tim Burton, period dramas, and historical fiction certainly leads me in that direction! But I am a little like a hummingbird, flitting from genre to genre in search of inspiration.

Friday, September 10, 2010

This is not a cooking blog...

But who would be able to resist sharing such cuteness? For his third birthday our son got some cooking utensils and silicon cake tins from his Aunty Relle and her In-Laws. I think he looks super gorgeous in his apron and hat!


And "Granny's little sister Aunty 'ron" (Veron) gave me a baking book that she had bought for herself, but thought might get a bit more use at my house. So today we made old fashioned gingerbread.


Mr 3 loved stirring and pouring and turning off my electric mixer. Turning it on however is a bit scarey ;)


He loved using his spoon and 'spatchla' to stir and scrape.


The recipe made quite a lot, in hindsight I should have halved it. As well as gingerbread men we made 12 gingerbread stars and a gingerbread bear.


I had to guess a bit with the timing as they were all different sizes, after 15 minutes instead of the documented 25 I thought everything looked about right.


Sadly the gingerbread bear fell apart when I was taking him out of his cake tin. So we ate him warm and he was delicious!

It's Shaun the Sheep!

As you get older birthdays become less and less of a big deal. Luckily I have a couple of kids to live vicariously through ;)

Every year I look forward to J's birthday, normally selecting which cake I will make him well in advance. Now he is a bit older of course I have to let him have a say too.

This year I got the ABC Kids Cakebook from the bookclub at work, so for his third birthday (just before we went on holiday) we selected Shaun the Sheep.

It looked simple enough, get some soft icing and dye it black. Hmmm, seems it made me black long before it did the icing, oh well...


Finally the icing turned black, after about half a bottle of black food colouring and I was ready to shape my body parts.


The completed Shaun cake required 2 cakes so I decided to make one plain and one chocolate. Time to cut out the body.


As all big kids know, the icing is the best part of the cake. This cake requires meringue icing. Yummmmmmmmmmy!


As the meringue icing doesn't keep long I had to make it just before the party. Assembly always takes longer than expected, got him made just in time. Not a bad effort hey?


Shaun was a big hit and our "big" 3 year old was very pleased with him.


Sadly the problem with character cakes is you have to cut them up and eat them! Hmmm seems a bit wrong LOL....


Just under 6 months until A's first birthday, perhaps just a little too early to select her cake.

Friday, August 13, 2010

Mini Masterchef

I got a call from Daycare the other day saying that as of next week they want to move my son to the pre-kinder room. While we were talking the carer mentioned that he had invited everyone to the blue house (our house) and when asked what they would do there he replied "Bake cookies".


Most fridays I bake something with my son, often it is for a playdate, but other times it's just because. I figure by making our own cookies I have more control over ingredients, additives (the dreaded numbers) and can hide other healthy bits and pieces in them too. And aside from all that, it's a fun activity for both of us!


Today we made oat and coconut crisps. We decided to be a bit decadent and put a dark chocolate bud on each one.


The end result, ok they look like eggs! But they taste delicious!

Wednesday, August 11, 2010

Chase the sun

Last week I showed you my new frangipani earrings which were a precursor to a special order.

Today I am happy to be able to show you the main event so to speak.


I still find it incredibly difficult to capture the true beauty of such stones, I think they are much more fabulous in real life.


These frangipani earrings with claw set peony pink topaz are already on their way to a good home. But if you are interested in a custom creation of your own don't hesitate to contact me.